Uncategorized Sarah Uncategorized Sarah

Eating Squirrel Food

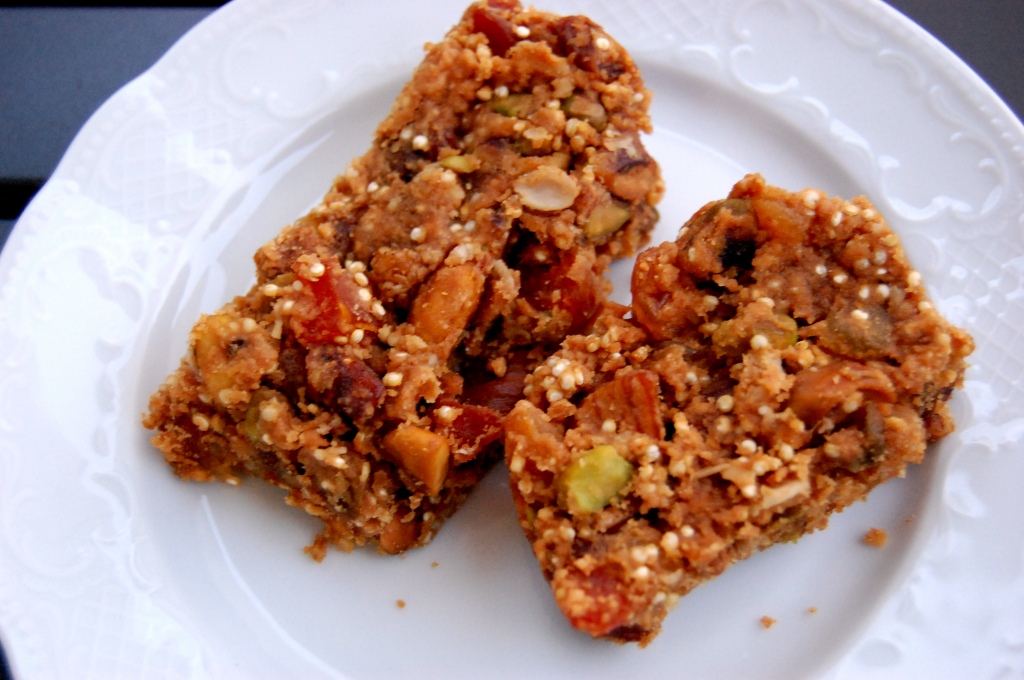
The question aimed at me yesterday while being transported to my happy place via the fresh batch of nut bars I had just made was, "So how's your squirrel food?" The sharp-shooter was my sister, who routinely makes joke of my eating habits. Admittedly, they are quite similar to a squirrel's at times. I've also been accused by a friend of eating bird seed for lunch, but that's another story. Nonetheless, if what I was eating was indeed fit for a squirrel, then it's really no wonder the critters act insanely high. They're in love with their lives! They're also insanely fortunate, because these bars are the best damn things I've tasted in a while. I know I say that a lot, but believe me this time.

I baked them, as the recipe says is okay to do, however I'd actually recommend refrigerating them instead. They were a little too crumbly to transport from plate to mouth in one piece, a huge problem for me because I like to stuff my face. So whether you choose to bake them or not, chill for an hour before eating and they should be good to go. The other great thing about them is that you can switch out any component for anything else your little heart desires. You've probably noticed that I'm attracted to recipes that allow for lots of creativity and wiggle room. I rarely make anything according to the original recipe, even on the first try. This has served me quite well for the most part, which is why I keep doing it. But of course, mistakes have been made too- you'll just see less of them here because that's embarrassing.

I must thank Green Kitchen Stories for the inspiration. Now, on with the recipe!

Granola Nut Bars

10 dates, diced 1/4 cup water 3/4 cup peanut butter 1 cup shelled pistachios, roughly chopped 1/4 cup old fashioned oats 1/4 cup quinoa 2 cups dried fruit, chopped (I used mulberries, figs, apricots, raisins) Line an 8x8 glass baking dish with parchment paper, making sure parchment comes above all sides of the dish. Preheat oven to 350, if using. In a saucepan over low heat, heat peanut butter, water and dates. Add the rest of the ingredients and stir to completely coat. If the mixture is too thick, add more water. If it is too thin, add more peanut butter. Remove from heat and press into baking dish. Bake for 20-25 minutes if desired, or just chill for an hour for more sticky bars (make sure to chill for an hour even after you bake them). Remove from pan and slice into bars. Store in the refrigerator.
Read More
Uncategorized Sarah Uncategorized Sarah

Eggshell in my cookies

Yeah, that happened. I spent several minutes picking out microscopic shards from the batter a few days ago. I wasn't baking for myself or for you lovely readers, so you won't see them here. I just wanted to brag about how I am SUCH  a good friend because I would never gift sharp and pointy cookies, especially to people I like. Let us all learn from my experience, and remind ourselves to crack eggs into a separate bowl before adding them to the dough! With the time you save by not having to extract shell pieces with tweezers, there are many and better things you could be doing. I'll let you use your imagination. Alright, let's get down to the real business of this post: My favorite brown rice breakfast!

I have plenty of almond milk from my milking spree the other day, and two tupperware containers full of brown rice (because I'm one of those plan-ahead people), so it's only natural that I share with you what I've been eating to begin my day. I'll start by disclosing the hard facts. Fact: This tastes incredibly good. Fact: This tastes like if banana bread and rice pudding had a love child. Fact: I love this breakfast like my own child. Of which I actually have none. Fact: This is a really healthy and wholesome way to salute the sun. Fact: You will feel really good after eating it because it is so healthy and wholesome. Fact: My brother said "I like this." THIS IS A REALLY IMPORTANT FACT. The great thing about using brown rice, oatmeal or quinoa as a base is that there are infinite combinations of flavors you could come up with. They are the perfect blank canvas for any and all random things you want to add in. The following is only what I've been making most recently. You need: 1 cup cooked brown rice 1 banana, mashed or sliced thin 1 Tbsp ground flaxseed 1-2 dried figs or dates, diced 1/2 tsp. cinnamon, plus more to taste 1/2 + 1/8 cup almond milk What you do: Place all ingredients in a bowl and thoroughly combine. Microwave for 2 minutes. Stir, add more cinnamon, add any other desired toppings (coconut and blueberries for me) and eat up! Good morning!

Read More
Uncategorized Sarah Uncategorized Sarah

Almond Milk

I love nut milk! Just crazy about it! What I could do without, however, are the additives like Riboflavin, various gums, and Carrageenan that store-bough milks have and don't do much for us in the health department.
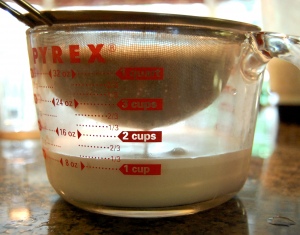
Luckily, making your own nut milk is extremely simple! The most time-consuming part happens while you're sleeping. I suggest you all try it. It's so worth it to have fresh, preservative-free, frothy milk to use any way you like. I use mine in smoothies, in hot cereal, and for baking. Watch, it's easy. And it only has 4 ingredients. Do it! DIY Nut Milk 1 cup almonds 3 cups water 1/2 tsp. vanilla extract honey Start by combining the almonds and water. Let them soak for about 8 hours, or overnight. Next, pour it all in a blender. Add vanilla extract and honey to taste, then blend like crazy for about a minute. I alternate between the 'blend' and 'shred' settings on my blender. Then, pour it in batches through a mesh strainer: Stir the pulp around and press down to release all the delicious milk you've just made. Save and refrigerate the pulp to use in smoothies and to make into nut butter! Once you've strained it all, pour into a large container and chill until ready to use. See? Wasn't that easy? Soooo good for you.
Read More
Uncategorized Sarah Uncategorized Sarah

August

Oh, August. You know what that means, don't you? I'll tell you. It means many of our fruit trees are bursting and bountiful! We had cherries and purple plums last month. Now we have red plums, peaches, and pears. Soon, the figs (eeeee!), persimmons and apricots will bring forth their beauty. It really is the beginning of the best time of year. August also means that I can officially get away with making fall-spiced baked goods. Yes, yes I can. Wanna fight about it? I thought not. Anywho, I cracked open a can of pumpkin puree to accomplish my latest oven-lovin, a cinnamon pear bread. I used fresh pears from our tree, which really made the whole thing that much more special. If you make this, get the freshest pears you can, and maybe dice them a little smaller than I did if you don't like big chunks.

They kind of look like yams, don't they? Let me assure you, they don't taste like yams. They taste like sweet August.

Cinnamon Pear & Pumpkin Bread

1 cup pumpkin

1/3 cup light olive oil (or any oil you prefer)

1/3 cup packed brown sugar

1 egg, beaten

1 tsp. vanilla extract

1 Tbsp bourbon

1 tsp. baking soda

pinch of salt

1 1/2 to 2 tsp. cinnamon

1 1/2 cups whole-wheat flour

1 Tbsp ground flaxseed

1 cup diced fresh pears, peeled and cored

Preheat the oven to 350. If you keep your flour in the freezer, like I do, remember to take it out well in advance! With a wooden spoon, mix oil into pumpkin puree in a large bowl. Add brown sugar, egg, vanilla and bourbon, then cinnamon, and thoroughly combine. Sprinkle baking soda, salt, and flax over batter and mix in. Then add flour and stir to combine. Finally, add pears and gently incorporate.

Pour mixture into an oiled and parchment-lined loaf pan. Bake for 35-40 minutes, until a tester comes out clean. Allow to cool before removing from pan. Slice and devour!

Read More
beans, chili, dinner Sarah beans, chili, dinner Sarah

3 Bean Chili with 2 secret ingredients and 1 large wound

To relieve my dad of household duties one night last week, I set out to make a hearty vegetarian chili with cornbread for dinner (to which he was very grateful). I was intrigued by this particular recipe because it uses both fresh orange juice and cocoa powder! This may seem unusual, as it did to me at first, but let me assure you that the results are pretty fantastic. My evening of rainbows and unicorns was abruptly jarred while doing the dishes, however. A small plate slipped out of my hands into the sink, shattered, and all of a sudden blood was everywhere. It happened so fast that I was left staring in shock for a few seconds at my throbbing hand, thinking to myself how I'd never bled that fast or that much before. I thought it would be appropriate at this point to reach for a cloth and mop myself up. And then go in search of gauze and tape. I still don't know how, excactly, the plate sliced me on its way down. Perhaps I never will. I guess the moral of the story is: This chili is great. So great, in fact, that I'd do the night all over again, bloody hand and all. It was worth it just to see my dad relaxed for a whole evening! Spicy 3 Bean Chili with Orange, Cocoa, and Cinnamon 3 Tbsp olive oil 2 cups chopped onions 3 cloves garlic, minced 4 tsp. chili powder 4 tsp. cumin 1 tsp. cinnamon 1 tsp. unsweetened cocoa powder 1/2 tsp. crushed red pepper flakes 1/2 tsp. thyme 1/4 tsp. paprika 1 can each: black beans, kidney beans, white navy beans 1 28-ounce can diced tomatoes in juice juice from 1/2 orange 15 ounces vegetable broth chopped fresh cilantro 1. Heat olive oil in a heavy saucepan over medium-high heat. Add onions and saute 5 minutes. Mix in garlic and spices, cooking until fragrant (about 1 minute). Add beans, tomatoes, and orange juice, stirring to combine. Add veggie broth and stir. Cover and simmer for about 15 minutes to let flavors combine. Stir in chopped cilantro and serve!
Read More